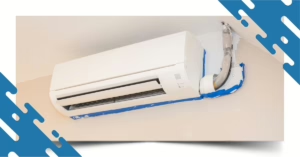

If your mini split is running longer than usual, blowing weaker air, developing a musty smell, or driving up your energy bill, the problem may not always be a major repair. In many cases, DIY mini split maintenance can help you keep your system clean, efficient, and operating properly.
The good news? Several basic maintenance tasks are safe for homeowners and require little more than a vacuum, mild soap, a soft cloth, and a garden hose.
However, DIY maintenance has limits. Refrigerant work, electrical repairs, deep coil cleaning, and other technical HVAC tasks should be handled by a qualified professional.
Regular homeowner maintenance combined with professional service can help improve airflow, reduce unnecessary strain, prevent avoidable problems, and extend the life of your ductless mini split system. Carrier currently recommends homeowner filter cleaning every 4–6 weeks and professional maintenance at least once a year.
Why Is DIY Mini Split Maintenance Important?
A ductless mini split has both an indoor air handler and an outdoor condenser. Dust can collect on the filters, dirt can build up around the outdoor coil, and condensate drains can become restricted over time.
When these components become dirty or obstructed, your mini split may have to work harder to maintain your desired temperature.
Regular mini split maintenance can help:
- Maintain proper airflow
- Improve system efficiency
- Reduce unnecessary energy use
- Prevent avoidable water leaks
- Reduce wear on system components
- Improve indoor comfort
- Help extend equipment life
- Catch potential problems before they become major repairs
5 DIY Mini Split Maintenance Tips That Save Us Thousands
So, how do you actually keep your mini split in top shape without spending a fortune on service calls? Most of the essentials are quick, easy, and can be done with items you already have at home. These DIY Mini Split Maintenance tips aren’t complicated—you just need to know where to start. Each one addresses the most common problems that lead to higher bills, decreased comfort, and potentially expensive breakdowns.
Let’s break down the five simple steps that can save you serious money and keep your system running like new.
Tip 1: Clean Your Mini Split Air Filters Regularly
Your mini split air filters are one of the easiest components to maintain—and one of the most important.
As your system operates, filters collect dust, pet hair, and airborne particles. When the filters become dirty, airflow can become restricted, forcing the system to work harder.
How to clean your mini split filters
- Turn off the mini split before opening the indoor unit.
- Lift or open the front panel according to the manufacturer’s instructions.
- Carefully remove the washable filters.
- Use a soft brush or vacuum to remove loose dust.
- If the filter is washable, rinse it with lukewarm water and mild soap.
- Allow the filters to air-dry completely.
- Reinstall the filters correctly before operating the system.
Carrier recommends checking and cleaning standard washable mini split filters about every 4–6 weeks, while some systems may require more frequent cleaning depending on usage and household conditions. Homes with pets, children, allergies, or significant dust may need more frequent attention. Always follow your specific manufacturer’s recommendations.
Important: Never operate your mini split without its required filter. Running without a filter can allow dust and debris to accumulate on internal components such as the evaporator coil and blower wheel.
Quick maintenance habit: Set a monthly reminder to inspect your filters. A few minutes of maintenance can help maintain airflow and keep your ductless system operating efficiently.
Tip 2: Keep the Outdoor Mini Split Unit Clean and Clear
Your outdoor condenser needs adequate airflow to release or absorb heat efficiently. Leaves, grass clippings, dirt, branches, and overgrown vegetation can restrict airflow around the unit.
How to clean the outdoor unit
- Turn the system off before cleaning.
- Remove leaves, grass, sticks, and other debris around the condenser.
- Keep vegetation trimmed away from the unit.
- Inspect the outdoor coil for visible dirt and debris.
- If your manufacturer’s instructions allow it, gently rinse the outdoor coil with a garden hose.
- Avoid pressure washers or high-pressure spray, which can damage or bend delicate coil fins.
Maintain approximately 2 feet of clearance around the outdoor unit and use gentle water pressure rather than a high-pressure nozzle when rinsing the outdoor coil.
How often should you check it?
Inspect the outdoor unit regularly, especially during periods of heavy pollen, storms, or falling leaves.
A quick visual inspection can help you spot obstructions before they affect system performance.
Do not attempt to remove panels or perform electrical work on the outdoor condenser. If the coil is heavily contaminated or damaged, schedule professional mini split cleaning or service.
Tip 3: Check the Condensate Drain for Blockages or Leaks
Your mini split removes moisture from indoor air while operating in cooling mode. That moisture collects in a drain pan and should flow safely through the condensate drain.
If the drain becomes clogged, water can back up and leak from the indoor unit.
Common warning signs include:
- Water dripping from the indoor unit
- Water stains on a wall or ceiling
- Standing water around the unit
- Musty odors
- Reduced cooling performance
- Ice or frost on the indoor coil
A dirty filter can also restrict airflow enough to contribute to coil freezing and subsequent water leaks.
What homeowners can safely check
- Turn off the system.
- Look for visible signs of water around the indoor unit.
- Inspect the accessible end of the condensate drain for obvious blockage.
- Keep the area around the drain outlet clear.
- If your system’s manufacturer specifically permits homeowner drain cleaning, follow those instructions.
Avoid forcing tools, compressed air, or chemicals into the drain unless the manufacturer’s instructions specifically allow it. Improperly clearing a condensate line can damage components or push the blockage farther into the system.
If water continues to leak, the drain is blocked, or you see mold or heavy buildup, contact an HVAC professional. Professional mini split maintenance can include flushing the condensate drain and inspecting the drain pan and internal components.
Tip 4: Inspect the Refrigerant Lines—But Don't Handle the Refrigerant
Refrigerant is essential for cooling and heating, but refrigerant maintenance is not a DIY task.
You can safely perform a basic visual inspection of the accessible insulated refrigerant lines and look for obvious signs of trouble.
Look for:
- Damaged or deteriorated insulation
- Visible oil residue around connections
- Physical damage to the line set
- Frost or ice buildup
- Unusual hissing sounds
- Longer-than-normal run times
- Weak cooling or heating performance
Refrigerant operates in a closed system and normally should not simply “run out.” If refrigerant is low, there may be a leak that requires professional diagnosis and repair.
Never try to recharge refrigerant yourself
Do not purchase refrigerant or connect gauges and hoses to your mini split unless you are properly certified and equipped to perform the work. EPA Section 608 requirements apply to refrigerant handling for stationary air-conditioning equipment.
If you notice ice buildup, poor cooling, or suspected refrigerant leakage, turn to a qualified HVAC technician rather than attempting a DIY recharge.
Tip 5: Check the Remote, Controls, and Basic System Operation
Not every mini split problem requires an expensive repair. Sometimes the issue is something simple, such as incorrect settings or weak remote batteries.
Perform these basic checks:
- Replace weak or dead remote-control batteries.
- Make sure the system is set to the correct operating mode.
- Check the temperature setting.
- Confirm the unit responds normally to the remote.
- Look for error codes on the indoor display or remote.
- Listen for unusual noises.
- Check whether the indoor fan is operating normally.
- Confirm the outdoor unit starts when the system calls for heating or cooling.
If the unit does not operate, you can also check whether a breaker has tripped. However, do not remove electrical covers or attempt electrical repairs yourself.
If the breaker repeatedly trips, the system displays an error code, or the unit makes unusual sounds, shut the system down and contact an HVAC professional.
DIY Mini Split Maintenance vs. Professional Maintenance
DIY maintenance is useful, but it doesn’t replace professional mini split service.
Homeowners can generally handle:
- Cleaning washable air filters
- Wiping the indoor cabinet
- Removing debris around the outdoor unit
- Visually checking the outdoor coil
- Checking for visible water leaks
- Checking remote batteries
- Monitoring system performance
- Looking for obvious signs of damage
Professional HVAC maintenance should include tasks such as:
- Deep cleaning the indoor evaporator coil
- Cleaning the blower wheel
- Thoroughly cleaning the outdoor coil
- Flushing and inspecting condensate drains
- Inspecting electrical connections
- Checking refrigerant operation
- Looking for refrigerant leaks
- Testing system performance
- Inspecting mounting hardware and refrigerant lines
Carrier recommends professional mini split maintenance at least once a year, with more frequent service potentially appropriate for systems that operate year-round for both heating and cooling.
A Simple Mini Split Maintenance Schedule
Maintenance Task | Recommended Frequency |
| Check/clean washable air filters | Every 4–6 weeks or as recommended by the manufacturer |
| Inspect indoor unit | Monthly |
| Check outdoor unit for debris | Monthly/regularly |
| Inspect condensate drainage | Periodically and whenever leaks appear |
| Check refrigerant lines visually | Each season |
| Professional mini split maintenance | At least once a year |
Your specific maintenance schedule may vary based on the manufacturer’s instructions, system design, usage, pets, indoor air quality, and local conditions.
When Should You Call an HVAC Professional?
DIY maintenance is great for routine cleaning and basic inspections. But some problems require professional equipment, training, and experience.
Call a qualified HVAC technician if you notice:
- Refrigerant leaks or suspected low refrigerant
- Ice or frost buildup
- Persistent water leaks
- Strange electrical smells
- Repeated breaker trips
- Unusual grinding, buzzing, or hissing sounds
- Significant loss of heating or cooling
- Persistent musty odors
- Error codes that don’t clear
- Damaged electrical components
- A mini split that repeatedly shuts down
Carrier also recommends professional evaluation for issues such as ice buildup, water leakage, reduced airflow, unusual noises, and damaged components.
Frequently Asked Questions About DIY Mini Split Maintenance
Yes. Homeowners can safely perform basic maintenance such as cleaning washable filters, keeping the outdoor unit free of debris, wiping the indoor cabinet, and monitoring the system for warning signs.
However, refrigerant work, electrical repairs, deep internal cleaning, and leak diagnosis should be handled by a qualified HVAC professional.
A good starting point is every 4–6 weeks, but you may need to clean it more often with heavy use, pets, dust, or other indoor air-quality concerns. Some manufacturers recommend different intervals, so always check your owner’s manual.
Turn off the system, remove the washable filter, gently vacuum or rinse it with lukewarm water and mild soap, and allow it to dry completely before reinstalling it.
You can perform basic exterior cleaning and gently rinse an accessible outdoor coil when permitted by the manufacturer. However, deep cleaning of the indoor evaporator coil, blower wheel, and heavily contaminated coils is best left to an HVAC professional.
No. High-pressure water can bend delicate coil fins and potentially damage the system. Use gentle water pressure and follow the manufacturer’s cleaning instructions.
Signs can include weak heating or cooling, unusually long run times, ice buildup, or hissing sounds. However, these symptoms can have other causes, so a professional diagnosis is necessary.
Refrigerant should not normally need routine “topping off.” A low charge can indicate a leak that needs to be identified and repaired.
A clogged condensate drain, dirty filter, frozen coil, or damaged drain pan can contribute to water leakage. If your mini split continues to leak after basic filter maintenance, professional inspection is recommended.
At least once a year is a good general recommendation. If your ductless system provides both heating and cooling throughout the year, additional seasonal service may be beneficial.
A well-maintained mini split can provide many years of service. Carrier notes that replacement is commonly considered around the 10–15-year range, depending on condition, repairs, efficiency, and other factors.
Keep Your Mini Split Running Smoothly
Related Blog Posts
Read more articles and expert advice related to this service.