Is your AC struggling to start, making weird humming noises, or blowing lukewarm air instead of that refreshing chill you expect? Chances are, the problem might be your AC capacitor—a small but mighty component that helps your system start and run smoothly. But what exactly is an AC capacitor, and how do you know if it’s failing?
Before you panic, know this: checking your AC capacitor doesn’t have to be complicated—or risky—if you follow the right steps. Curious how to inspect it safely? Want to learn the simple tricks that can save you from expensive repairs?
Let us guide you through everything you need to know to check your AC capacitor easily and safely, along with tips to keep your system running like new. And if DIY isn’t your thing, don’t worry—Iron Shield Heating & Air has your back, ready to handle any AC capacitor issue with speed and expertise.
What is an AC Capacitor?

- Start Capacitor: Provides a strong jolt of energy to help the compressor or fan motor start. It only works momentarily, but it is crucial for a smooth startup.
- Run Capacitor: Keeps the motors running efficiently after startup, helping maintain stable airflow and optimal cooling.
- Dual Capacitor: This unit combines both the start and run functions in one, and many modern AC systems use it to save space and simplify installation.
Signs Your AC Capacitor Might Be Failing
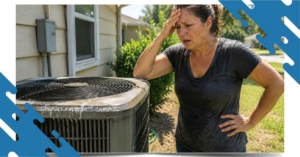
- Is your AC hesitating before turning on, or failing to start completely?
- Do you hear a loud humming or buzzing coming from your outdoor unit when the fan isn’t spinning?
- Is the air coming from your vents warmer than usual or uneven throughout your home?
- Is your AC turning on and off repeatedly without completing a full cooling cycle?
- Do you notice bulges, leaks, or burn marks on your capacitor?
Safety First: Preparing to Check Your AC Capacitor
- Turn Off the Power. Switch off your AC at the thermostat and then turn off the breaker that powers your outdoor unit. Double-check that the unit is completely off before moving forward.
- Protect Yourself with Gear. Safety glasses and insulated gloves are a must. Even a discharged capacitor can have residual energy, so protection is essential.
- Use Insulated Tools. Only use tools with insulated handles to avoid accidental electrical contact.
- Discharge the Capacitor Safely. Capacitors can hold a charge longer than you’d expect. Use a proper resistor or an insulated screwdriver, and never touch the terminals with your bare hands.
- Work in a Dry Environment. Moisture and electricity don’t mix. Make sure the space around your AC unit is dry before starting.
Step-by-Step Guide to Checking Your AC Capacitor
Checking your AC capacitor can feel a bit intimidating at first, but understanding each step and taking your time can make the process much more manageable and safe. Even if you’re comfortable with basic DIY tasks, capacitors hold electrical energy, so it’s important to approach this carefully. If you ever feel unsure, don’t hesitate to pause and reach out to a professional—safety always comes first.
Here’s a simple, step-by-step approach:
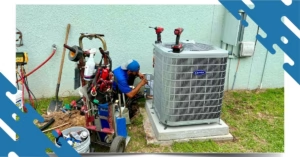
1. Locate the Capacitor
Start by locating the capacitor inside your outdoor AC unit. Most capacitors are small, cylindrical, or oval-shaped devices usually mounted near the compressor or fan motor. Many modern units feature a dual capacitor, which combines both the start and run functions into a single component. If you need extra guidance on identifying your AC capacitor, you can follow this detailed guide on how to check an AC capacitor. Before touching anything, take a moment to visually familiarize yourself with its terminals and overall shape. Recognizing the capacitor before you begin will make the following steps easier and safer.
2. Inspect Visually
Next, carefully inspect the capacitor. Carefully inspect the casing for any signs of damage or wear. Common indicators of a failing capacitor include bulging or swollen sides, leaking fluid, burn marks, or corrosion on the terminals. Even minor damage can affect performance, and if you notice any of these signs, it’s often better to replace the capacitor rather than attempt repairs. A visual inspection alone can save you from more extensive problems down the line.
3. Discharge the Capacitor Safely
Once you’ve assessed the capacitor’s exterior, the next step is to safely discharge any stored electrical energy. Capacitors can retain a charge long after your AC unit has been turned off, and touching the terminals without discharging them first can result in a serious shock. Using a proper resistor or an insulated screwdriver, carefully bridge the terminals to release the stored energy. Take your time with this step—rushing increases the risk of injury.
4. Test the Capacitor with a Multimeter
After the capacitor is safely discharged, it’s time to test it with a multimeter. Set your multimeter to measure capacitance and carefully connect the probes to the capacitor’s terminals. Compare the measured value to the specifications printed on the capacitor itself. A reading that is significantly lower or higher than the listed capacitance indicates the capacitor is failing or already faulty. At this stage, it’s important not to try to “fix” the capacitor; replacement is the safest and most reliable solution.
5.Evaluate and Decide Next Steps
Take a moment to assess your findings. Even if the capacitor appears to be working correctly, testing and inspection are crucial for identifying early signs of wear before they lead to major AC problems. Regular professional maintenance is also recommended, as trained technicians can identify subtle issues that might be missed during a DIY check.